3d scanning

Darren Wright

Administrator
Staff member
Messages
20,228
Location
Springfield, Missouri
I've been spending a little time looking at reviews of some of the current consumer hand held 3d scanners on the market lately. There are several out there and showing promise as a viable option for a small business or fabricator to use for scanning and making products that accurately fit first time from the scans made. Most of the latest ones are touting .1mm accuracy, which isn't bad.

The iPhone scan app I've been playing with has yielded decent results, but the lidar sensor it uses isn't as accurate as some of the structured light and laser scanners available.

From what I've also seen, the software for the scanner itself plays a huge role in the ease of use and quality of the scan.

Out of all the ones I've watched reviews on (almost all below), the Creality Scan Ferret and Shining 3d Einstar stood out the most.
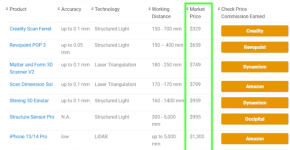
Screenshot 2024-01-08 at 4.35.08 PM.png

I really was leaning towards the Shining 3d Einstar. The reviews were good and the software really stood out for ease of use. It however did require more of a gaming level of computer for the processing of the scan, which would have added another $1k to the entry price for me. So, I decided to take the plunge on the Creality Scan Ferret Pro version as it is able to scan objects up to 2 meters in size. The software works on mobile, laptop, and desktop devices. Obviously it won't do the same scale of work as the Einstar scanner, but I think it will do what I'm wanting to do with it.

Some of the use cases I have in mind are gun stocks for the cnc rotary, scanning some parts of my tractor and truck to have accurate models to design accessories for, and for many 3d printing projects.

It outputs OBJ, STL, and PLY files, so can import into Fusion360, Meshmixer, Blender, and other software programs for editing.

I'll post up results as I get more experience with it. It should be here early next week.
 
I've been spending a little time looking at reviews of some of the current consumer hand held 3d scanners on the market lately. There are several out there and showing promise as a viable option for a small business or fabricator to use for scanning and making products that accurately fit first time from the scans made. Most of the latest ones are touting .1mm accuracy, which isn't bad.

The iPhone scan app I've been playing with has yielded decent results, but the lidar sensor it uses isn't as accurate as some of the structured light and laser scanners available.

From what I've also seen, the software for the scanner itself plays a huge role in the ease of use and quality of the scan.

Out of all the ones I've watched reviews on (almost all below), the Creality Scan Ferret and Shining 3d Einstar stood out the most.

View attachment 128427

I really was leaning towards the Shining 3d Einstar. The reviews were good and the software really stood out for ease of use. It however did require more of a gaming level of computer for the processing of the scan, which would have added another $1k to the entry price for me. So, I decided to take the plunge on the Creality Scan Ferret Pro version as it is able to scan objects up to 2 meters in size. The software works on mobile, laptop, and desktop devices. Obviously it won't do the same scale of work as the Einstar scanner, but I think it will do what I'm wanting to do with it.

Some of the use cases I have in mind are gun stocks for the cnc rotary, scanning some parts of my tractor and truck to have accurate models to design accessories for, and for many 3d printing projects.

It outputs OBJ, STL, and PLY files, so can import into Fusion360, Meshmixer, Blender, and other software programs for editing.

I'll post up results as I get more experience with it. It should be here early next week.
Looking forward to your updates on this
 
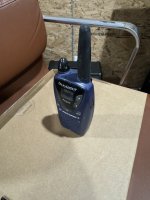
Well, here is the first scan, of a Motorola walkie talkie I have in my office.
IMG_0394.jpeg

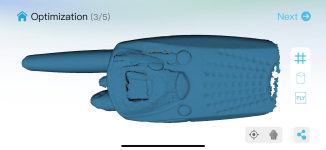
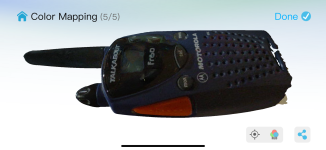
The scan on the phone, with and without images.
IMG_0392.png IMG_0393.png

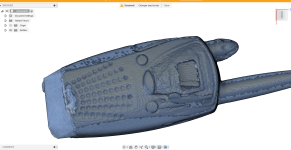
I imported the project over to the desktop app and did some clean-up. There were some gaps, such as the bottom missing and gaps behind the belt clip. One can do multiple scans and merge them to get parts that one scan do not, but I opted to simply close them so I could test out the software more.


After some clean-up I exported the STL file and imported it to F360. I ended up doing a few key measurements to check accuracy and all were within .1 mm of the actual measurements.
f360motorola.png

The scan was free handed. I'll have to see if I can find one of our turn tables or make one and perhaps mount the scanner on my good camera tripod.
 
What scanner and software did you use?
The Creality CR Scan Ferret Pro, which I actually got on Walmart.com a bit cheaper.
https://a.co/d/0G4fjov

If you’re planning to use a pc, the non pro version is without the WiFi 6 adapter. I most likely will be using a pc for my purposes going forward, but may use the WiFi adapter time to time.

The non pro version still comes with a phone cable.

There are some minimum specs around the phone and desktop hardware you’ll need too.

Edit: the non-pro version... https://a.co/d/brs6CUA
Edit: The phone cable only seems to work with certain android devices, not iPhone (USB-C), so the wifi version would be needed for iPhone 12 pro and higher I believe. Otherwise use with a desktop of the recommended hardware specs.
Edit: There is a list of recommended android phones in section 5 here: https://wiki.creality.com/en/Products/3D-Scanner/CR-Scan-Ferret-3D-Scanner/User-Manual
 
Last edited:
So I found my old Samsung S21FE that I replaced a couple of years ago when I switched phone services. I got it charged up and updated. It doesn't have phone service, but connects to wifi.

I installed the Creality Scan app and it recognized the scanner right away. It actually launches the app when you plug in the cable. I'll do some testing with it to see if it has the heat build-up my iPhone had or not. I'm not sure if the heat was from processing or the wifi transfer, maybe both.

For the project I have in mind for the scanner, it's going to be used connected to a PC anyway, but will be nice if I can use it with the Samsung and not my iPhone
 
Ok, tried doing some free hand scanning, as I don’t have lazy susan on hand. I was getting quite frustrated trying to get a complete scan.

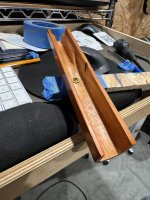
It tools some fiddling with the settings and turning off the automatic settings to get it to work with the Red Ryder foregrip I was trying to scan. I found I had to lower the IR exposure.
IMG_0438.jpeg

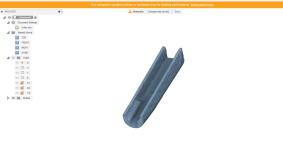
This took a bit of cleanup and some fixing of the form where I had the foregrip screwed on the stick. I used the mesh mixer software from autocad. Technically could have also done it in F360 as it is based off mesh mixer.

Overall, it’s a little bumpy and I’ll probably use it for re-drawing the piece in F360, but will be a good reference. Measurements in the key areas are pretty close.
IMG_0439.png

I’m working on the stock scan now, will post those results up when I get it cleaned up.
 
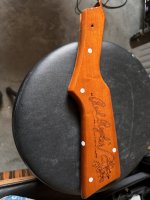
Last night I scanned the stock for the Red Ryder and kept having issues losing tracking or getting a "co-planer surface" error, which meant it couldn't see enough details to track. Once again, I attached a stick to the stock to hold it by while free hand scanning it.

I changed the settings to use the "Texture" scan option and put a bunch of tracking dots all over the stock to give the software something to keep track of. There is a "Marker" tracking option that uses the dots to track, but haven't been able to get it to scan. The software shows it sees the dots, but perhaps I'm not using enough of them for the size of the piece.
IMG_0440.jpeg

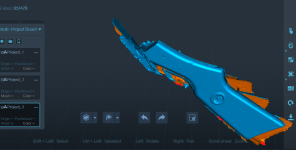
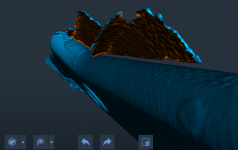
The scan lost tracking several times, resulting in extra faces that I had to manually remove before exporting from the scanner software.
stock1.png Stock Cleanup.png

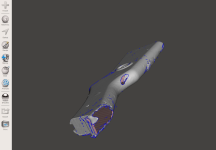
Once I finished removing the extra faces, I was left with a few holes and missing areas of the scan. I used Meshmixer to do hole repairs and to make the object a solid.
StockMeshmixer.png

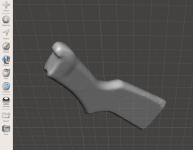
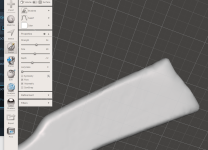
I then started skulpting to re-create the missing sections. I build them up, then like using modeling clay, start to shape a click or small area at a time until it starts to look like the original stock. I still have work to do on these areas.
StockMeshmixerskupt.png stockcleanupbuttrepairs.png
 
I'll probably re-scan the stock. While I'm scanning I can pause and restart. So I'll probably scan close to the areas where the stick is attached, pause, remove the stick and complete scanning of that area.

Part of the problem I had with scanning the end of the butt of the stock, was that It was an odd angle holding the stock with the stick on it. I may try hanging it from a string too or making a rotisserie to spin the stock on.
 
Top