A few sheaths...

Mike Stafford

Member
Messages
2,368
Location
Coastal plain of North Carolina
At long last I have completed my first foray into the making of sheaths for my knives. Let me tell you it is almost an embarrassment to post them in the Leatherwork category. It has been one learning experience for me. I wasted quite a few pieces of leather until I finally figured out how design the sheath to accommodate not only the blade but part of the handle.

Getting the knife to fit snugly into the quiver style sheath was difficult. Accounting for the extra width was hard for me to get right. Also the thin leather my wife bought for me did not work for molding. Molding is the process whereby you soak a completed sheath in water and then stick the carefully plastic wrapped knife into the sheath and mold it to the contours of the blade and handle. I did this on a few knives but the thin leather I was working with did not have enough body to retain the molded shape.

All of my sheaths do incorporate welting which is just another layer of leather that is shaped to match the contour of the knife blade and is glued and sewn into place between the outside pieces. Essentially the welting forms a pocket within the sheath to protect the threads.

Stitching up the leather was an interesting experience as the saddle stitch I was using requires the maker to use two needles at once. Once I got the hang of it I was able to sew up a sheath fairly quickly but it was tough on my hands and many times I had to use pliers to pull the needles through the pre-punched holes. The holes are punched with a leather awl which has a diamond shaped point. The holes are spaced in my sheaths at 4mm apart so even on a relatively small sheath there was a lot of stitching to do. I also back stitched on each end at least 5 stitches to reinforce those areas. The stitch holes lie in grooves that are cut with a groove cutter so that they lie more or less flush with the leather surface. That was more difficult than it sounds in the soft leather I was using.

The edges of the leather are beveled and then rounded over with a rounding tool that is a chisel that rides on the corner of the leather to remove it. Once the corners are rounded I applied an edge coating that sealed the exposed flesh side of the leather to offer some protection and stiffness.

I worked my way into making a few sheaths with belt loops just to learn the process. Future knives with probably all have a sheath with a belt loop.

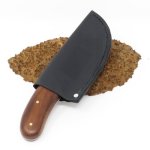
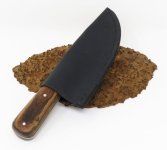
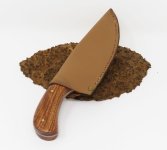
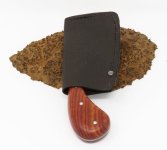
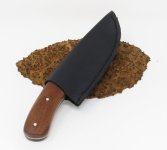
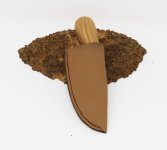
Here are a few of my quiver style sheaths. Nothing fancy but they do protect the knife and the user from the knife's edge.

In this sheath and a few others I used a rivet near the opening to tighten it up so the knife would be retained a little better by the sheath.
IMG_0398 mod (Custom).jpgIMG_0402 mod (Custom).jpg
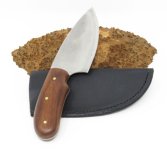
The sheath for this Inuit pattern skinning knife incorporates welting on both edges of the drop point to ensure the blade sits safely in the sheath.
IMG_0392 mod (Custom).jpg IMG_0394 mod (Custom).jpg
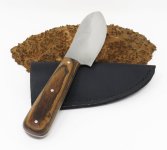
Another sheath where I used a rivet to tighten up the opening so that this skinning knife would fit in the sheath a little more snugly.
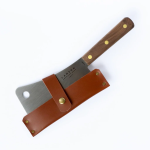
IMG_0422 mod (Custom).jpgIMG_0424 mod (Custom).jpg

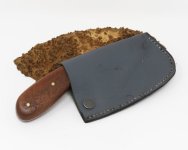
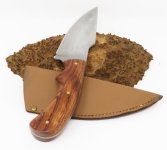
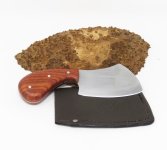
The shape of this little rosewood cleaver required me to shape welting that protected the stitching along the side with the blade edge as well as the end of the sheath. I added a rivet to snug up the opening just a bit.
IMG_0470 mod (Custom).jpgIMG_0472 mod (Custom).jpg
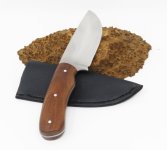
This sheath for the walnut camp knife was one of the best fitting I made. It fit snugly around the portion of the handle that was inserted into the sheath.
IMG_0413 mod (Custom).jpgIMG_0415 mod (Custom).jpg

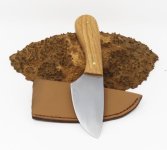
This sheath for the little oak handled skinner fits nice and snug on the handle which securely holds the knife.
IMG_0438 mod (Custom).jpgIMG_0440 mod (Custom).jpg

Applying the sealer to outside edges of the leather and welting was an interesting job. The sealer is a mixture of shellac and dye and is quite runny.
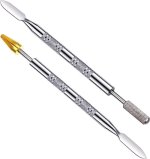
My first attempts were using a wool dauber. This proved to be quite messy. So I ordered a set of tools that incorporate textured rollers that are dipped into the
sealer. The tool is then rolled onto the leather and the sealer is applied in a very controlled manner. I was skeptical of these tools when I ordered them but they worked like a charm.

71rqtoK6zvL._AC_SL1500_ (Custom).jpg
 
Last edited:
Looking good! I'm a fan of the safety rivet especially with thinner /lighter leather (it's less useful imho on thicker stuff but still looks good). I like that Inuit skinner pattern as well I think that's a winner.

I saw a post a while back on one of the leatherworking groups on how to incorporate a "latch" into your sheaths akin to the little locking tab some kydex sheaths have. I think the idea would work pretty well with some of your knives, although I'm having trouble finding the post now.. the basic idea is to make the welt a bit wider at the top and split it so there's a short "tab" the knife has to push past that will bounce back into the notch behind the blade.

For the cleaver a back latching axe style sheath might have been interesting since I think it has enough shape to support it.. Gives folks a little teaser at the whole package.. Kind of like this..
1680313647559.png

BTW the amazon cobbler machines are sort of hit & miss.. Some of them people get to work right out of the box, some of them people never get to work, some are able to get working with some effort. I've seriously considered one and there are a couple folks on youtube who have done some really good breakdowns of how they work and how to tune them.. which honestly put me even more on the fence hah

If you haven't tried a lacing chisel for doing the initial hole punching it was for me a game changer. Even the fairly cheap ones work pretty well (like https://www.amazon.com/gp/product/B01ALZ5M3I/ worked ok). I'll still use an awl to open up the holes right when sewing but it's vastly less effort.

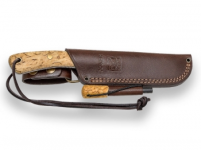
Some of the bushcraft folks are sporting sheaths with a built in ferro rod like this joker montanero (ferro rods are pretty cheap in bulk and with a small turned/carved handle make nice gifts/sale items as well). You can also put a piece of leather or paracord from the knife lanyard hole and stretch it over the bottom of the ferro rod as well to kind of lock everything in place (you can see the ferro rod is also retained the same way here). I could see this being a fun option for the hunting/camp type knives (less so for things like a dedicated skinner).

1680313535574.png

I've been buying leather mostly from https://www.acadialeather.com/ (their "grab bags" are.. extremely good deals and after one of those I have enough leather for the next 5+ years of projects - it's hard to over state just how much leather 200 square feet is haha) and https://theleatherguy.org/ which are basically all seconds (but he's pretty honest about what the flaws are in the hide you're getting so if you read the description there's not really a lot of surprises - I also mostly only shop his clearance section which means sorting through a lot of .. weird... stuff to find things that are useful). I've also bought a few more exotic things from https://www.hideandfur.com/ which is just fun to poke around...
 
Looking good! I'm a fan of the safety rivet especially with thinner /lighter leather (it's less useful imho on thicker stuff but still looks good). I like that Inuit skinner pattern as well I think that's a winner.

I saw a post a while back on one of the leatherworking groups on how to incorporate a "latch" into your sheaths akin to the little locking tab some kydex sheaths have. I think the idea would work pretty well with some of your knives, although I'm having trouble finding the post now.. the basic idea is to make the welt a bit wider at the top and split it so there's a short "tab" the knife has to push past that will bounce back into the notch behind the blade.

For the cleaver a back latching axe style sheath might have been interesting since I think it has enough shape to support it.. Gives folks a little teaser at the whole package.. Kind of like this..
View attachment 124673

BTW the amazon cobbler machines are sort of hit & miss.. Some of them people get to work right out of the box, some of them people never get to work, some are able to get working with some effort. I've seriously considered one and there are a couple folks on youtube who have done some really good breakdowns of how they work and how to tune them.. which honestly put me even more on the fence hah

If you haven't tried a lacing chisel for doing the initial hole punching it was for me a game changer. Even the fairly cheap ones work pretty well (like https://www.amazon.com/gp/product/B01ALZ5M3I/ worked ok). I'll still use an awl to open up the holes right when sewing but it's vastly less effort.

Some of the bushcraft folks are sporting sheaths with a built in ferro rod like this joker montanero (ferro rods are pretty cheap in bulk and with a small turned/carved handle make nice gifts/sale items as well). You can also put a piece of leather or paracord from the knife lanyard hole and stretch it over the bottom of the ferro rod as well to kind of lock everything in place (you can see the ferro rod is also retained the same way here). I could see this being a fun option for the hunting/camp type knives (less so for things like a dedicated skinner).

View attachment 124672

I've been buying leather mostly from https://www.acadialeather.com/ (their "grab bags" are.. extremely good deals and after one of those I have enough leather for the next 5+ years of projects - it's hard to over state just how much leather 200 square feet is haha) and https://theleatherguy.org/ which are basically all seconds (but he's pretty honest about what the flaws are in the hide you're getting so if you read the description there's not really a lot of surprises - I also mostly only shop his clearance section which means sorting through a lot of .. weird... stuff to find things that are useful). I've also bought a few more exotic things from https://www.hideandfur.com/ which is just fun to poke around...
It is obvious you have forgotten more about leather work than I am likely to ever know. Those are some pretty incredible sheaths compared to what I have made. I have a lot to learn. I really like that cleaver sheath for some of the knives that I have found difficult to sheathe. I have some snaps and have made a few sheaths that use a snap to secure the blade. Your design is much better than what I came up with. This sheath has a snap and keeps the blade inside but isn't the best solution. I have an idea how to make something that will be more secure and attractive than what I have pictured just by seeing your solution. I should have made a strap and snap over the end of this sheath which would have been more secure and easier to use.

IMG_0468 mod (Custom).jpg

I have made that Inuit pattern knife in a couple of different sizes and they have sold quickly. It is one of the easier patterns for me to cut out with the tools I have which are basically a 4 1/2" grinder with a cutoff wheel and another 4 1/2" grinder with a grinding disc mounted vertically in a jig I made.

I appreciate the leather sourcing link. I doubt I could use 200 square feet of leather in what life I have remaining but maybe I could split a purchase with a couple of friends. My wife bought bags of scrap (2 or 3 pounds) from one of the craft stores she frequents. I have made over 30 sheaths now with an investment in leather of less than $12. But as I said this leather is quite thin and not moldable. That said, so far none of the people who have bought my knives have complained. At least they offer some protection for the blade and the user.

Thank you for all the ideas and feedback. How little I know about the process really shows and your suggestions are appreciated.
 
Mike, I should have been more clear that the sheaths and leather work I personally do look MUCH more like something a three year old with palsy did and the ones I showed pictures of above are sheaths by other people to illustrate the design that actually shows it as intended instead of something.. else.... My stitching used to be better, and it's improving again with renewed practice but to say I feel your pain there is wildly understating the case haha.

Snaps can be really nice, but I've had a hard time sourcing any that last for beans personally. I know we had some that were good many years ago but a lot of the modern ones wear out awfully fast. I've used button studs on one side with leather straps with a hole and a slit in them going over the stud from the other with some success (you can see how the hole & slit works here: https://www.amazon.com/PH-PandaHall-Screwback-Gunmetal-Platinum/dp/B091PX14WB/). There's less to go wrong with those anyway although they're also not as secure as working snap. I have a handful of snap projects in line though so if you've found good ones I'd be certainly interested, otherwise I'll probably try to figure out how to do the closures some other way.

Some light bridle leather imho makes very nice sheaths, it's a bit glossy due to high oil count and has a really nice feel. It's also veg tan so it wet molds fairly well (although perhaps not quite as easily as straight veg tan but it also holds up better due to the high oil/wax content). Saddle skirting leather is also good but like some finish once you've wet molded it. I managed to pick up a couple of shoulders of bridle leather really cheap from theleatherguy a few years back and am still working through that. Be careful on the weight as some of it can be a bit heavy but most of it's not to bad. something in the 6-8oz range is usually decent, you could go a bit higher to maybe 8-10 on the bigger knives or for belt loops and the thicker stuff is nice for welts.

You might also consider trying some other burnishing gums... I tried a couple and some were a LOT easier to use than others. I've mostly settled on this stuff https://www.amazon.com/gp/product/B017X8GL9A/ which is fairly viscous and it's pretty easy to apply a very light amount just with my fingertip. I haven't tried their colored versions just the plain clear/white one so I don't know if they all have the same viscosity.. If I want color I'll just use a dab of Fiebings first: https://www.amazon.com/Fiebings-50-2046-BU-P-Leather-Dye/dp/B0078EDCAG?th=1

I'm still super impressed at how consistent and clean you're getting the grind from your angle grinder setups. You should patent those or something... It's a really sweet setup.
 
All of them are impressive, congratulations. I wish one could find the rivets and hardware needed here, so far I can only somewhat restore old knives found around my FILS house.
 
I'm still super impressed at how consistent and clean you're getting the grind from your angle grinder setups. You should patent those or something... It's a really sweet setup.

Ryan, I appreciate the comments and sources for materials. I have always said you don't know what you don't know so I appreciate any pointers that will help me improve my skills.

I had to laugh when you suggested I patent my jig for grinding angles on my knife blades. I will include pictures of it below and after I/we quit laughing I will consider the patent. It is not often that you see such a well-designed and accurately manufactured accessory/fixture. :ROFLMAO: :ROFLMAO: :ROFLMAO:

Side view of my grinder fixture. The bolt shafts serve as handles for controlling the fixture when I am moving it across the table . The fender washers and wing nuts lock the bolts in place to maintain the amount they project through the bottom to establish the angle of the front of the fixture against which the blade is clamped while I am grinding.. You can see the angle that is created by tilting the front face of the fixture.
IMG_8968 mod (Small).jpg

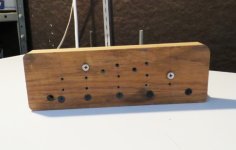
Here is the front of my fixture showing a series of pre-drilled holes into which I can screw dry wall screws. I rest the heel of the blade on the heads of these dry wall screws and clamp the blade to the upright plywood section. Then it is just a matter of sliding the fixture back and forth consistently on the table of the belt sander while I am grinding the bevels. After each pass I take a water soaked rag and wipe down the blade to keep it cool. The only control I have for consistency is to keep track of how many passes I make on each side and try to do the same number on each side. It ain't pretty but it seems to work.
IMG_8972 mod (Small).jpg
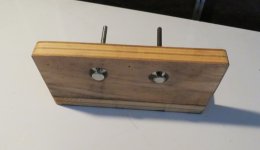
Bottom view showing bolt heads that I have ground off smooth to slide on my belt sander table.. The projection of the these bolt heads determine the angle I am grinding on my blades. It is hard to see them but there are T-nuts in the countersunk holes into which the bolt shafts are screwed.
IMG_8969 mod (Small).jpg
 
I think the fact the jig is so simple is really part of why it’s so well done. It’s sort of like the old story about how “I’m sorry I had to write such a long letter as I lacked the time to write a shorter one”. Form distilled to the base of function.

my mother spent some time as a glover in England working, as I recall, for Harrods.
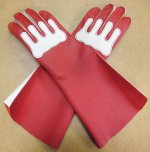
That is truly next level work. I made one pair of mittens once but gloves are much harder and those are very nice pieces of work. Thanks for sharing the picture of them
 
That is truly next level work. I made one pair of mittens once but gloves are much harder and those are very nice pieces of work. Thanks for sharing the picture of them
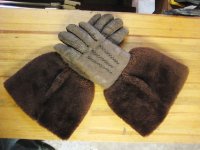
Thanks. The leather ones were properly double-stitched (two needles as Mike's). Here's a set of shearling whip-stitched dress gloves. The cuff goes over the coat sleeve to keep the wind out. I found the hardest part is to not have the fingers do a corkscrew. BTW, hand stitching a pair of gloves takes me about 40 hours.

ShearlingGlove_01.jpg
 
Nicely done. When I do projects like that I clamp the halves together and use my drill press to make the holes. I use the two needle method with triangular points. Sadly, I lost my favorite needle, it was HUGE, about 10" long but easy to handle.
 
Nicely done. When I do projects like that I clamp the halves together and use my drill press to make the holes. I use the two needle method with triangular points. Sadly, I lost my favorite needle, it was HUGE, about 10" long but easy to handle.
I glue the two pieces together with the welting in between. I actually use small/tiny little clamps to hold the pieces together until the glue cures for 24 hours. Next I cut grooves in the leather so that the stitches will lay even with the top of the leather. Once the grooves are in place I use a spacer tool to mark the location of holes in the groove for sewing. Those holes I punch with a leather awl. I would prefer to drill the holes but the leather I am using is just too soft to get a clean hole.

When I am stitching I use a stitching pony to hold the piece while I am stitching.
Sounds like you have a good system down pat. Only change I would personally make is to use a leather hole punch instead of the awl. But, if it works for you, it works.
 
Top