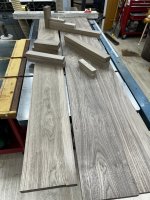
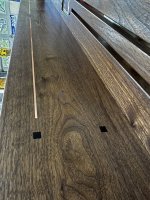
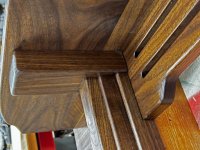
Hanging entry shelf.

Rennie Heuer

Moderator
Staff member
Messages
11,666
Location
Constantine, MI
Next project on the schedule is this hanging entryway shelf. I designed this for a client in Oregon who is a fan of G&G. He likes for me to add lots of G&G touches. Lots.

It will be walnut with ebony accents. The back plate takes its deign ques from several ceiling fixtures, primarily from the Gamble house. I have an aluminum french cleat system marketed by (I think) FastCap. Hoping it works well!
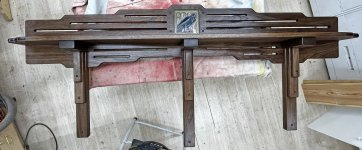
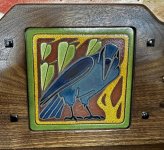
Its 72" long and 32" tall from the top to the bottom of the center leg. Thhere will be an antique ceramic tile framed in the center. The rendering below is a meager attempt at some AI enhancement courtesy of SketchUp.
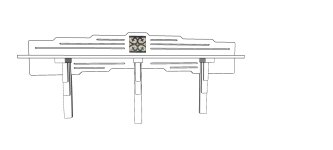
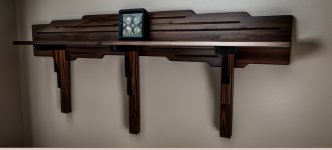
G&G Style Entryway Shelf2a.jpgDraft - 12-18 a.jpg
 
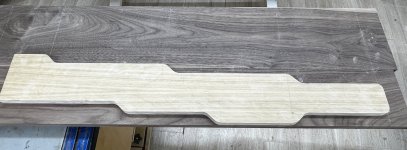
First order of business today was to make the template for the numerous cloud lifts. Having never done a 1" lift before I could not rely on my stock of templates from previous projects and had to start from scratch. I first made an MDF template of a single cloud lift. I use this to mark out all the lifts on the larger template.
IMG_2847.JPEG

I then took the full sized template to the band saw and drum sander. The curves are then fine tuned with some 150 grit and a small sanding block until the curves all match the guide lines and any roughness from the bandsaw blade is gone.

The template will be used for both the bottom and top profiles. It aligns with the centerline on the backsplash and is simply flipped end for end.

Top profile
IMG_2848.JPEG

Bottom profile
IMG_2849.JPEG

Because of the size of this piece - 72" long, 14" wide - I don't think I will be able to do any of this on the bandsaw. I will likely use a jigsaw to do the initial cut and then screw the template to the back of the backsplash and use my hand held router to do the final profile.
 
First things first.

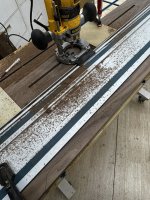
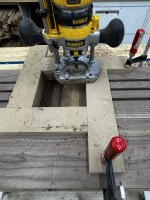
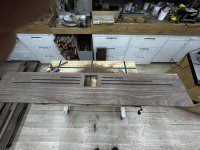
Before I cut any of those cloud lifts, I decided to do all the slotting and the cut out for the tile while I still had straight edges to measure from. I used an adapter for my saw track to guide the router and simply clamped a few stops to the workpiece.
IMG_2859.jpeg


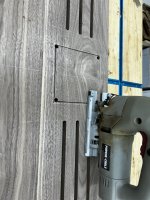
The cut out for the tile is simple, drill, a few holes in the corners, jigsaw out the waist. Then I used a flush trim bit and a makeshift template to finish the job.
IMG_2860.jpegIMG_2861.jpeg
With all the slots cut and the cut out for the tile done, I can now flip it over and use a rabbiting bit to cut the recess for the tile to fit in. That will have to wait till next weekend.
IMG_2863.jpegIMG_2864.jpeg
 
Wow, I really let this thread slip. I took a few pics along the way but never posted. :dunno::doh:

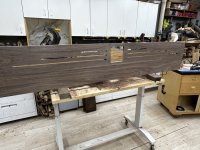
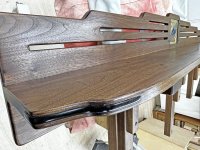
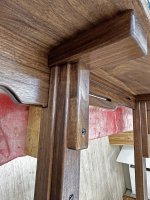
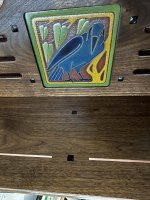
Well, here's the finished project ready for crating and shipping. It was built to be knocked down. The shelf and corbels attach with machine screws from the back into threaded inserts. The whole thing hangs from a commercially available aluminum french cleat system designed for kitchen cabinets.

Really hard to get nice photos while it is lying on its back.


IMG_2931.jpgIMG_2932.jpgIMG_2933.jpgIMG_2934.jpgIMG_2935.jpgIMG_2936(1).jpgIMG_2937.jpg
 
Wow, I really let this thread slip. I took a few pics along the way but never posted. :dunno::doh:

Well, here's the finished project ready for crating and shipping. It was built to be knocked down. The shelf and corbels attach with machine screws from the back into threaded inserts. The whole thing hangs from a commercially available aluminum french cleat system designed for kitchen cabinets.

Really hard to get nice photos while it is lying on its back.


View attachment 129768View attachment 129769View attachment 129770View attachment 129771View attachment 129772View attachment 129773View attachment 129774
Another fine "Heuer Original."
 
Top